Pages

Tuesday, October 28, 2014

Twilight Zone Party


In ten years of marriage, my husband and I have established a tradition of hosting a few annually recurring events. For many years, one of these was our yearly Hitchcock Movie Night. Every October we'd gather with a handful of friends to eat spooky treats and watch some of Hitch's classics--Rope, Rear Window, Vertigo, Frenzy, and others. Having gone through quite a bit of the Hitchcock catalog by now, this year we thought it would be fun to switch things up a little. Recently we realized that several seasons of The Twilight Zone are on Netflix. Anthony grew up watching The Twilight Zone, but I'm a relative newbie (though I did see the Talking Tina episode as a child and was SCARRED). So we figured a Twilight Zone episode viewing night would be an interesting diversion from the lengthier Hitchcock movies--and it was! Unfortunately, due to the cold and flu season that seems to have started way earlier than usual (which almost sounds like the premise of a TZ episode), there were only a total of five of us that night, but hey, our couch isn't that big anyway. I made some campy decorations, a few creepy desserts and some mildly alcoholic cider punch, and we were good to go. My best friend Joy and I even spent the couple of weeks before the party writing and filming our own 4-minute Twilight Zone episode, which I wish I could show you here, but Blogger tells me it's too large to post. Waaaahhhh. 

Anyway, here's a rundown of the details of the evening in case you ever get the hankering to host your own homage to the uncanny in glorious black and white.

Decorations:

When it comes to party decorations, my motto is "When in doubt, go to Michael's and go crazy with patterned paper." If you noticed the picture above, you'll see I am dead serious. To set the dichromatic tone, I made a couple of signs featuring the tagline from the Twilight Zone intro: You have now crossed over into...The Twilight Zone. I printed this sentence off an image on the internet, cut it out, and pasted it onto some snazzy black-and-white paper and boom, instant Twilight Zone party decor. 


Next, rolling along with the patterned paper, I embraced my inner pennant fetish by making a black and white banner to hang over the food.


Speaking of the food...


Mother-of-mercy-what-is-that-terrifying-creation, you ask? Oh, just a pair of baby arms reaching from the grave, nothing to be alarmed about. Actually, it's supposed to be baby arms reaching up from a garden bed....which was the premise of the episode my friend Joy and I wrote and filmed. (Now you really want to see it, right?) So these peanut butter frosted, graham cracker topped brownies were a delicious little tie-in with our project. 


Loooooook into my coooookie. Our second sweet something was another visual to match the Twilight Zone theme. Even though I haven't seen all that many TZ episodes, one image I associate with the show is a spinning black and white spiral. To me, these chocolate-orange pinwheel cookies looked just like an edible version of it. I used this recipe for chocolate orange cookies, and then, instead of mixing the chocolate and orange doughs, I kept them separate and rolled them out to two rectangles of the same dimensions...


laid one on top of the other...


chilled for awhile, then rolled the whole thing up...


sliced, and baked as directed.


 Definitely a winner of a cookie I will repeat next Halloween!

In addition to our sweet treats (and some popcorn to round out the movie night menu) I made a pitcher of this chilled spiced rum and cider punch


If I had my way with October in Phoenix, we'd be able to drink our cider hot, but the sad truth is that it was 95 degrees the day of this party and I didn't want our guests sweating to the point of sliding off our leather couch. So chilled cider it was! I added a cinnamon stick or two and about a teaspoon of whole cloves to give it a little extra spice.

Last but not least, I would be remiss if I didn't share the diverse mix of Twilight Zone episodes that made the party memorable:

1. The Fever: Franklin Gibbs believes gambling is an inexcusable vice...until he tries it.
2. What You Need: A man has the mysterious ability to give people exactly what they will need in the near future.
3. Living Doll: Little Christy's doll Talking Tina has a mind of her own...and she's prepared to use it.
4. Terror at 20,000 Feet: William Shatner stars as a man flying home after 6 months in rehab for a mental breakdown. Is he really cured? 
5. Walking Distance: A very unusual, meditative episode about the transience of life and holding on to the good.

Though our party was almost two weeks ago, I've continued to ruminate on these episodes. The Twilight Zone continues to be a thought-provoking show, even 50 years after its air time. Thought-provoking enough, in fact, to consider having another party next year!

Thursday, October 23, 2014

Parsley-Parmesan Whole Roasted Cauliflower


Stop. Everything. There is an awesome way to roast cauliflower that I need to make you aware of. Did you have any idea you could roast the WHOLE THING? Like the entire head of cauliflower? Well, I didn't--or at least, I did, but then I forgot. Like many a shiftless Pinterest user, I pinned something about this concept awhile back and then proceeded to not look at it for several months. Then for some reason tonight as I was contemplating how to make cauliflower to accompany a pork roast, that lovely image of a whole cauliflower roasted in all its cerebral-looking glory sprang back into my mind. Was it secretly difficult, I wondered? Was there some secret to why Western civilization has not evolved to cook cauliflower this way? Nope and nope (or I don't actually know about the second one. The Illuminati could have its reasons for keeping the general public away from whole roasted heads of cruciferous vegetables. They're weird like that.)

Roasting the entire head takes somewhat longer than roasting florets, and of course you don't get browning on as much surface area, but I'd say the interesting presentation makes up for those drawbacks. (Never thought you'd need a pie server to serve cauliflower, right?) Plus, even as a veggie caramelization devotee, I felt the flavor combination of parsley, parmesan, and mustard was a nice change from the near-blackened version I usually make.  With Halloween right around the corner, the only way I can think to improve it is to find some way to make it look even more like a brain. How's that for a healthy Halloween treat?


Parsley-Parmesan Whole Roasted Cauliflower
(Adapted from Food Network)

Ingredients:

1 head of cauliflower
2 Tbsp. olive oil
1 1/2 Tbsp. dijon mustard
salt and pepper, to taste
1 Tbsp. + 1 tsp. dried parsley flakes
2 Tbsp. grated Parmesan cheese

Directions:

1. Position an oven rack in the bottom of the oven and preheat to 450 degrees.

2. Remove the leaves from the cauliflower, then trim the stem so the cauliflower can sit flat. Place the head in a 9" round cake pan (or a roasting pan/cookie sheet--I just liked the way it fit so snugly in a round cake pan).

3. In a small bowl, mix olive oil and dijon mustard. Brush all around the outside of the cauliflower. Sprinkle with salt and pepper.

4. Roast in the preheated oven until tender and browned, about 50 minutes.

5. Let the cauliflower sit for a few minutes. Mix dried parsley and Parmesan, then sprinkle to cover. Cut into wedges and serve.

Serves 5-6 as a side dish.

Monday, October 20, 2014

Spinach Feta Quiche


Sometimes in this stage of life I feel like so many of my friends and family members are having babies that Target should just hand me a pack of diapers and onesies every time I pass through their automatic doors. (And take the 30 bucks right out of my wallet.) In the last month and a half, our extended family has welcomed one new niece and one new nephew. Then there's also my cousin who's pregnant, my good friend, my other good friend, and basically 80% of my Facebook friends, it seems. For me, it's fun to visit friends and loved ones with itty bitty newborns....and then hand them back to mom or dad to deal with because that stage of life is DONE for me!!! *Insane cackle* 

I jest. God only knows whether my husband and I will ever have any more children.* (*Official Catholic cover-your-butt statement.) But it is such a blessing to watch so many friends with growing families, and--maybe my favorite part--to bring them meals. This past week I was slated to take dinner to my brother-in-law and sister-in-law, whose little girl had arrived a few days before. When taking a meal to new parents, I always try to stick to the following rules:

--Reasonably healthy (nursing moms need good nutrition)
--Travels well (as much as I love soup, it does not pass this test)
--No dishes need to be returned (because this is a hassle for everyone)
--Nothing too crazy (I'll save my Jellied Boar Snout recipe for another time)

There are many dinners that meet these criteria, but one of my favorites is this spinach feta quiche. You may have noticed, if you are a human being who eats solid food, that spinach and feta are a Mediterranean Dream Team. 


So it will probably come as no surprise to you that this spinach feta quiche is delicious. But I will tell you, having tried MANY such combinations in my many years as a quiche eater, that this one is far and away the best I've ever had. The addition of cheddar kicks it up a notch to cheesy, spinachy, herby bliss. And while it meets all the above standards for a great meal to take to new parents (baked in a disposable aluminum pan so no dishes need be washed or returned), it could also just as easily make a pretty brunch item or dinner for vegetarian guests. Any way you slice it--literally--this is one you don't want to miss.


Spinach Feta Quiche
(Adapted from Allrecipes.com)

Ingredients:

3 Tbsp. butter
3 cloves garlic, minced
1 small onion, chopped
1 10-oz. package frozen spinach
1 6-oz. package herb and garlic crumbled feta cheese
1 c. shredded Cheddar cheese, divided 
1 unbaked 9-inch pie crust
4 eggs, beaten
3/4 c. milk
salt and pepper, to taste

Directions:

1. Preheat oven to 375 degrees.

2. In a large skillet, melt butter over medium heat. Saute garlic and onion in the butter until lightly browned, 7-10 minutes. Stir in spinach, feta, and 1/2 c. cheddar and heat through. Season with salt and pepper. Pour into pie crust.

3. In a medium bowl, whisk together the eggs, milk, salt, and pepper. Pour over spinach mixture.

4. Bake in preheated oven for 15 minutes. Sprinkle the top with the remaining 1/2 c. cheddar and bake an additional 35-40 minutes until set in the center. Let stand 10 minutes before slicing.

Serves about 5 as a main dish. 

Monday, October 13, 2014

Cream Cheese Apple Tart


So it's been two weeks since my last post, which is the longest I've ever gone without blogging since first starting this endeavor last June. I'm sure all three of my readers are seething with rage and anxiety. But it's been a super busy few weeks, which tends to leave blogging in the dust. First my husband went out of town, meaning I was fending for myself with three little kids for a few days. Then I decided to give him a taste of his own medicine by going out of town myself for three days to my 10-year college reunion in Illinois. The fellowship was sweet, the fall colors were gorgeous, and my poor little tuckus was just about frozen right off of my body. I had signed up to do the Homecoming 5k, but when the morning dawned at about 35 degrees with snow flurries, I decided I'll save my running in extreme weather conditions for the Zombie Apocalypse, thank you very much. All in all, it was a great trip, though.

The colors! And the friends! And the memories!
The day I returned from the Chicago area, my brother came to town for a few days, inspiring the following goofy faces like any good brother/uncle: 


Since my kids were on fall break, we were able to have some quality time with Uncle Joel, visiting the pumpkin patch, going to parks, and arguing over whether it's okay for him to teach my children how to belch on command. 

Now that things are beginning to settle back down to normal and we're almost halfway through October, I'm ready to share this lovely dessert to ring in the autumn spirit, if you haven't already rung it in yourself with tall boots over jeans and pumpkin spice lattes to the point of credit card debt. It has two of my favorite flavors of fall--apples and cinnamon--with a unique twist, something different from the usual apple pie. (Not that there's anything wrong with the usual apple pie.) 


I've made this twice now and received several compliments on its taste and appearance. The fancy-looking apple pinwheel effect on top definitely gives it visual appeal, and the taste is just as good as the look. Plus, I love the unexpected cheesecakey layer hiding underneath the apples.


And doncha just want to grab that one gooey-looking cinnamon apple on top?


I'd be willing to bet you'll make a lot of friends if you bring this in place of apple pie to your family's Thanksgiving this year...but why wait until then? It's October--let the autumn eating commence!

Cream Cheese Apple Tart
(Adapted from The Cooking Channel)

Ingredients:

For the crust:
1 homemade or purchased pie crust

For the cream filling:
8 oz. cream cheese, softened
1 egg
1/4 c. sugar
1/2 tsp. vanilla extract

For the apple top:
2 large Granny Smith apples, peeled and sliced
1/4 c. sugar
1 tsp. cinnamon

Directions:

1. Bake the pie crust according to package directions in a 10-inch tart pan (or 9-inch pie plate).

2. Preheat oven to 400 degrees.

3. In a medium bowl, beat together cream cheese, egg, sugar, and vanilla until smooth. Pour into the baked pie crust.

4. In a large bowl, mix sugar and cinnamon. Add apple slices and toss to coat. Arrange individual apple slices in a pinwheel pattern on top of the cream cheese filling, starting at the outer edge of the tart and working inward.

5. Bake about 40 minutes, until apples are tender and golden.

Serves 8.


Monday, September 29, 2014

6 Things You Didn't Know About Fat


There are various ways to look at the word "fat." Most of us think of the word with pejorative overtones, something we don't want applied to us. The adjectives aren't pretty and evoke feelings of playground humiliation: chubby, flabby, plump, chunky, pudgy. Then of course you could think of "fat" like that fat check you got when you finally sold your Van Halen live-in-concert VHS collection on Craigslist. And don't even get me started on "phat" (mostly because, even as a child of the '90s, I still don't think I get it.) But there's another set of terms I want to talk about today. Terms like lipid, adipose, triglyceride, sterol, fatty acid. These describe the other kind of fat, the macronutrient every human being requires to sustain life. There are so many fascinating aspects to dietary fat and the way our bodies use it, and quite possibly a lot you didn't know.

As I've progressed in my coursework toward becoming a Dietetic Technician, I've come to understand so much of what always seemed confusing about fat nomenclature. Since I've learned how to navigate the different kinds of fat (like that mental image?) I thought I'd share some of the information I've found interesting and helpful.

1. Let's start with an cool trivia point: what's the fattest organ in your body? Your brain! About 60% of your brain's matter is fat. So if someone calls you a "fathead," you can be proud to know you're perfectly normal. (And they're a fathead, too. Obviously.)

2. Fat provides 9 calories per gram (whereas carbs and protein provide 4). This is true across the board for any fat. That's why, even though nutrition labels list number of calories from fat in a food, you can always calculate it yourself by multiplying the grams of fat by 9.

3. What's the difference between saturated and unsaturated fats? You probably know they must be related because they have that word "saturated" in common. To understand the difference between these types of fat, you have to understand what "saturated" means. Fat is made up of carbon chains. In saturated fat, all of the available carbons in the chain are bonded with hydrogen...kind of like how I always felt at junior high dances when all the cute boys immediately paired up with the popular girls. All the carbons are taken, paired off, saturated. In unsaturated fats, however, there's a break in the music, a chance for a different kind of bond. Instead of all the carbons being taken up by hydrogen, something called a double bond occurs, which, instead of bonding a carbon to hydrogen, bonds carbon to another carbon, leaving it not entirely saturated...in other words, unsaturated. And the only difference between a monounsaturated fat and a polyunsaturated fat is that a mono has only one of these breaks, whereas a poly has two or more.

4. Now that you know the difference between saturated and unsaturated fat, it probably makes sense why saturated fat is generally solid at room temperature. Everything is paired off and packed in, making it denser. On the other hand, unsaturated fats (like oils) are generally liquid at room temperature for the opposite reason.    

5. What about trans fats? What are they and why are they so scary? Somewhere along the line, scientists realized that they could mess with the chemical structure of unsaturated fats (i.e. oils) by plopping in some extra hydrogen where it didn't really belong to create what are called trans fats. The process of unnaturally adding hydrogen is known as hydrogenation. So when you see the word "hydrogenated" on an ingredient list, you know the food contains some amount of trans fat, even if the label says 0 grams trans fat. (The FDA allows foods with .5 grams or less per serving to round down to zero.) Research has yet to show exactly why trans fats have a negative effect on health, but they have definitively been linked to coronary heart disease and several other conditions you don't want to get.

6. One last kind of fat you hear a lot about is Omega 3s. The reason these unsaturated fats have this name is simply due to the spot where they have their carbon-to-carbon bond: on the third carbon from the end. Bet you can guess where Omega-6 and Omega-9 have theirs now, too. 

Okay, that was kind of a lot of chemistry. I should probably stop now. But I have so many more things I want to tell you about fat! I'll be hoarding up my fat facts for another post soon, focusing on fat's effects in your body. And if you're still hungry for macronutrient info, you can head over to my carbohydrate facts page!

Sunday, September 21, 2014

Tofu Parmesan


Allow me to introduce you to my good friend tofu parmesan--or, as I like to think of it, the ultimate tofu dish for people who think they don't like tofu. I want to tell you all about its cheesiness, its crispiness, its sauciness, and its nearly magical ability to turn a tofu hater's head. But first, a word about tofu itself. Tofu (and soy in general) seems to be one of the latest in a line of polarizing foods--you have your soy cheerleaders and your soy disparagers, your soy zealots and your soy-phobics. One group's research says soy reduces the recurrence of cancer; another group's says it increases incidence. The science is vague but the fears are real. As for me, I try to keep a clear head and practice moderation in all things food-related. I eat soy as a small part of my regular diet (though I probably get more of it than I realize from whatever processed foods I might eat...isn't soy in everything these days?) and haven't seen any real convincing evidence that it's either extremely beneficial or terrifyingly dangerous. So my two cents is that it's a perfectly reasonable food to include sometimes, especially in an effort to reduce meat consumption. With that in mind, this tofu parmesan has been part of my ongoing effort to shimmy our family's meat intake down to 50% of our meals. Someday I'll write a separate post on all the reasons that propel that effort, but for now, let's talk about I'm such a fan of this particular vegetarian meal. 

In the reviews of the original recipe this version stems from, one made me laugh out loud. The reviewer said when she made it for her tofu-suspicious husband, he said he "knew there was tofu in the recipe, but was unable to find it between the 'chicken' pieces." Which is pretty much a perfect summation of tofu's greatest asset, one that stands out in this recipe: its ability to slip into whatever flavor we dress it with. It is the consummate food chameleon. To the reviewer's husband, it tasted like chicken. To me, tofu breaded and surrounded by cheese and tomato sauce just tastes comforting and Italian-y, like lasagna...which is the main reason it succeeds so well with tofu skeptics. 

The process of taking this:

  
to this:


does take some effort, but the payoff is worth it! You're gonna feel like a tofu pro by the end. 

Here's how it works. First, you slice extra-firm tofu into 1/4 inch thick slices, starting at the long end of the tofu rectangle:


Next (and this is crucial to the level of crispiness you'll get in the end), squeeze as much moisture as possible out of the slices by pressing them into paper towels:


Then, if you have time, it helps to freeze the tofu pieces for about 30 minutes. More time probably wouldn't hurt, either.

Wax paper on baking sheet = no-mess cleanup

Last, once the tofu emerges from the freezer nicely firmed, bread with a mix of herbed Panko bread crumbs and Parmesan and bake at 350 degrees for 15 minutes per side. 


From here, you're ready to assemble and bake it into a gooey, savory meatless casserole nobody has to know isn't chicken!

Tofu Parmesan
(Inspired by Allrecipes.com)

Ingredients:

For the tofu:
12 oz. extra-firm tofu
3/4 c. Panko bread crumbs
1/3 c. grated Parmesan cheese
1 tsp. dried basil
1 1/2 tsp. dried oregano
salt and pepper, to taste
1 egg

For the sauce:
16 oz. tomato sauce
1 tsp. dried basil
2 tsp. dried oregano
1/2 tsp. garlic powder
1/4 tsp. salt

6 oz. shredded mozzarella cheese

Directions:

1. Cut tofu into 16 1/4 inch thick slices, starting on the long end of the rectangle of tofu. Squeeze as much moisture as possible from slices by pressing the slices into paper towels. If time allows, freeze tofu slices for about 30 minutes.

2. Preheat oven to 350 degrees. In a shallow bowl, combine bread crumbs, Parmesan, basil, oregano, salt and pepper. In another shallow bowl, beat egg slightly. Remove tofu slices from freezer. Dip individual pieces first into the beaten egg, then into bread crumb mixture. Place on a greased baking sheet and bake 15 minutes on each side.

3. Meanwhile, prepare sauce. In a small bowl, mix tomato sauce, basil, oregano, garlic powder, and salt.

4. Increase oven temperature to 400 degrees. Spread a layer of tomato sauce in the bottom of an 8-inch square baking dish. Place 8 tofu slices in a single layer on top of sauce. Cover tofu with sauce, then a layer of mozzarella. Repeat once more: 8 tofu slices, sauce, and mozzarella. You may end up with extra sauce.

5. Bake about 20 minutes or until heated through with melty cheese on top.

Serves 4. 

Thursday, September 18, 2014

Boston Cream Pie


In 2003, the state of Massachusetts made a bold decision. They designated the Boston Cream Donut as the OFFICIAL DONUT of the state. Good call, Massachusetts. Both on your choice of donut and the choice to have an official state donut. (Massachusetts is, in fact, the only state to have an official donut. The other 49 states need to rectify this immediately.) So it's all well and good that the people of the Bay State get to enjoy this monument to deliciousness in an official capacity.

But guess what, Massachusetts? Somebody beat you to it.

ME!!!!

The Boston Cream donut has been MY official donut since at least 1991. 

For as long as I can remember, I have ALWAYS ordered a Boston Cream donut whenever possible at a donut shop. It started when my grandparents from Iowa would come to town and take my brother and me out for lunch at Sizzler and then to Dunkin Donuts for dessert. (The year 1991 is somewhat arbitrary--I was 9 then, which is about when I first recall this ritual with my grandparents starting.) Even at that young age, I can remember the sureness of my decision. No strawberry frosted, no long johns, no chocolate glazed. I want the grand daddy, that pie-within-a-cake, dream-within-a-dream ALL-STAR Boston Cream Donut. Dark chocolate frosting, buttery cake, and glorious cream filling--can you see why I (and, oh yeah, Massachusetts) have appointed it my official donut?


Since it was recently my birthday and I always enjoy making my own birthday cake, I decided this was the year to try actually making a Boston cream pie (which, if you didn't know, is actually a cake. So in donut form it's a donut that's a pie that's a cake. Still with me?) For as many times as I've eaten Boston cream donuts, it's rare that I have Boston cream pie--and still rarer (as in, never) that I've had a homemade Boston cream pie. So giving it a try sounded fabulous. I actually happen to have a cookbook all about the food of Boston, so I pulled it out to find....


Nothing! This cookbook about the distinctive recipes of Boston does not contain a Boston cream pie recipe. Inexcusable.

Disgusted.

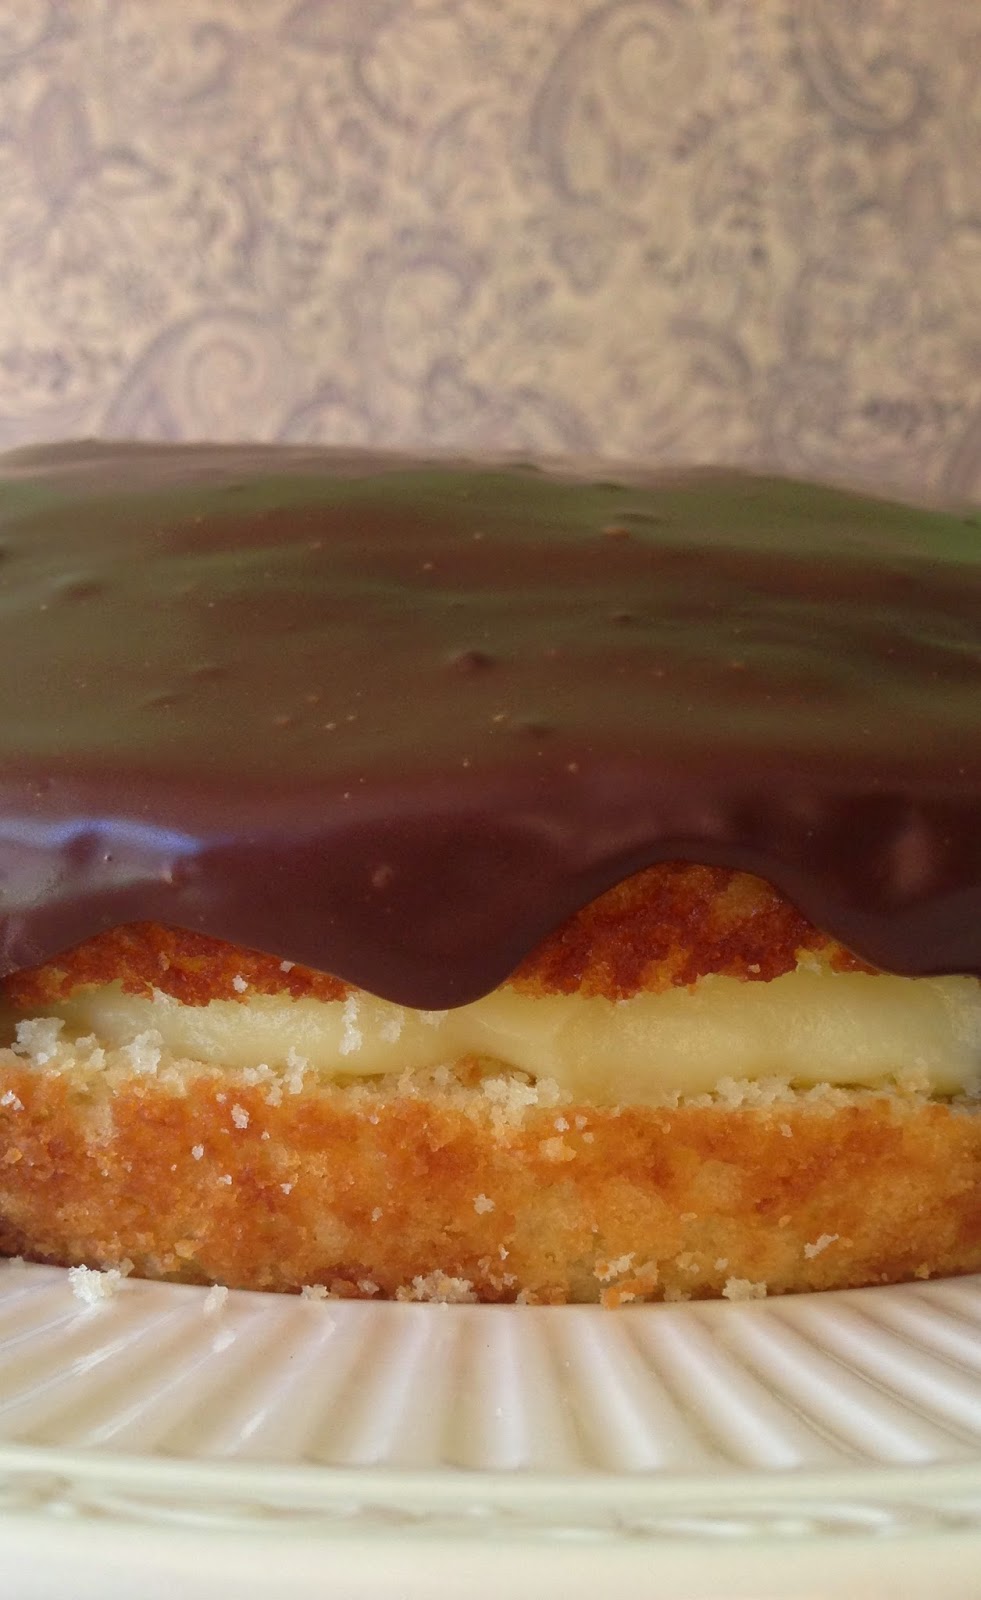
(Though, actually, otherwise it's a pretty good cookbook.) Anyway, thank goodness for the Internet, which of course yielded countless Boston cream pie recipes. Sifting through them revealed that most of the top hits had only four-star or less ratings, and I knew this birthday called for a five-star cake. I ended up deciding on one from Saveur.com that had all five-star reviews, and was not disappointed! Neither, I'd say, were the other ten or so people who shared it with me. My neighbor, who recently traveled to Boston, said she thought it was better than the version she'd had at a famous bakery there. The chocolate on top is nice and dark--not too sweet--the cake is fluffy, and the vanilla cream set up perfectly, with just the right amount of spreadability.

Trying not to get my hair in the chocolate. Or the fire.
All in all, it made for a happy birthday cake realization of my Official Donut--a cake inspired by a donut inspired by a cake (with the name of a pie). 


Boston Cream Pie
(Slightly adapted from Saveur.com)

Ingredients:

For the cake:

1 1/2 c. all-purpose flour
2 tsp. baking powder
1/2 tsp. kosher salt
12 Tbsp. butter, softened
1 c. sugar
2 tsp. vanilla extract
3 eggs
2/3 c. buttermilk (see my baking substitutions page for other options)

For the filling:

1 c. sugar
1/4 c. corn starch
1/2 tsp. kosher salt
6 egg yolks
1 1/2 c. milk
4 Tbsp. chilled unsalted butter, cubed
2 tsp. vanilla extract

For the glaze:

4 oz. 60% bittersweet chocolate, finely chopped
1/2 c. heavy cream

Directions:

1. Make the cake: Preheat oven to 350 degrees and grease a 9" round cake pan well. Whisk together flour, baking powder, and salt in a bowl; set aside. In a large bowl, beat butter, sugar, and vanilla until fluffy, about 3 minutes. Add eggs one at a time, beating well after each addition. Alternately add dry ingredients and buttermilk and beat until just combined. Pour into prepared pan and smooth the top. Bake about 35 minutes or until a toothpick inserted in the center comes out clean. Cool in the pan 15 minutes, then invert onto a wire rack to cool completely.

2. Make the filling: In a 4-quart saucepan, whisk together sugar, corn starch, and salt. Add egg yolks and whisk until smooth, then stir in milk. Heat pan over medium heat and cook, stirring constantly, until thickened, about 10 minutes. (Be especially watchful in the last 3 minutes or so, as the mixture goes from liquid-y to pudding-y quite quickly.) Remove from heat and add butter one cube at a time, whisking until smooth. Stir in the vanilla extract. Transfer the pudding to a bowl and cover with plastic wrap. Chill until firmed, at least 2 hours.

3. Make the chocolate glaze: Place chopped chocolate in a bowl. In a 1-quart saucepan over high heat, bring heavy cream just to a boil. Pour cream over chocolate and let sit 1-2 minutes. Slowly stir the chocolate and cream until smooth and shiny, then set aside to cool for 10 minutes. 

4. Assemble the cake: Using a serrated knife, carefully slice cake horizontally into two layers, with the top layer being slightly smaller than the bottom. Spread the chilled pudding over the top side of the bottom layer, then cover with the top layer. Pour chocolate glaze evenly over the top of the cake, letting it drip down the sides. Refrigerate until glaze is set, at least 30 minutes. Serve chilled or at room temperature.

Generously serves 10. (But could be stretched for 12!)